
Moving house is brutal. Studies rank it alongside divorce and losing a job on the stress scale, and in New Zealand it gets harder. You’ve got bond inspections that decide whether you see thousands of dollars again. A school year that ends right when half the country tries to move at once. And if you’re hopping the Cook Strait, a ferry that books out weeks ahead.
Most “moving checklists” online were written for Americans. They list utility companies you’ve never heard of, ignore your bond, and have zero clue what WINZ is.
This one’s different.
We’ve spent years moving Kiwi families across Christchurch and the rest of NZ. Hundreds of moves. We built this checklist from what actually goes wrong, not what sounds good in a blog post. It covers WINZ moving help, the NZ bond refund process, inter-island timing, and the local quirks no overseas guide will ever mention.
Grab a cuppa. Let’s get you sorted.
Are you buying rather than renting? Some steps below are renter-specific (bond refunds, landlord notice, bond inspections). Scroll to the “Homeowners: Your Key Extra Steps” section after Week 4 for your settlement-day and pre-move checklist.
Why a Moving Checklist Actually Matters in NZ
You can wing a lot of things in life. Moving house isn’t one of them. Not here.
The NZ rental market is tight, bond refund deadlines are unforgiving, and ferry slots between islands disappear fast. Miss a step and the cost adds up quick. A forgotten utility disconnect can mean two weeks of paying for power at an empty house. A sloppy bond inspection can cost you a four-figure refund. A late ferry booking in January can mean delaying your move by a fortnight.
Peak NZ moving season runs roughly late spring through summer, lining up with the school year change and warmer weather. Either way, the lesson is simple. Plan early. Book early. Tick things off as you go.
Your Moving Timeline at a Glance
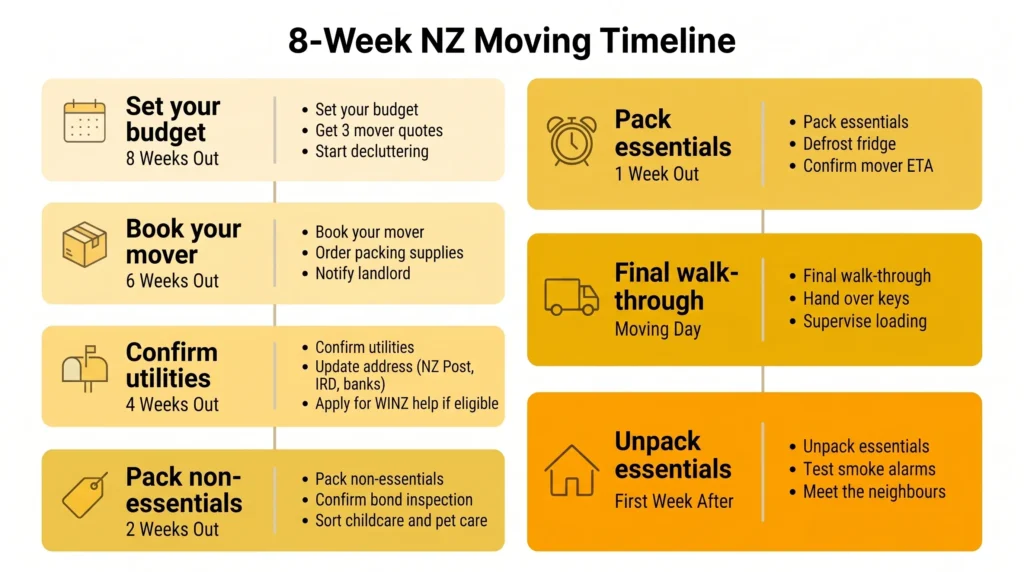
| Time Before Move | Top 3 Priorities |
| 8 weeks out | Set your budget. Get 3 mover quotes. Start decluttering. |
| 6 weeks | Book your mover. Order packing supplies. Notify landlord (if renting). |
| 4 weeks | Confirm utilities. Update address (NZ Post, IRD, banks). Apply for WINZ help if eligible. |
| 2 weeks | Pack non-essentials. Confirm bond inspection. Sort childcare and pet care. |
| 1 week | Pack essentials. Defrost fridge. Confirm mover ETA. |
| Moving day | Final walk-through. Hand over keys. Supervise loading. |
| First week after | Unpack essentials. Test smoke alarms. Meet the neighbours. |
Stick this on the fridge. Then keep reading for what each stage actually involves.
8 Weeks Before Moving: The Foundation
This is where good moves are made or broken. Skip this stage and you’ll be paying for it later. Literally.
Set Your Moving Budget
Be honest about what this is going to cost. A move isn’t just the truck.
You’ll also need to factor in:
- Packing materials (boxes, tape, bubble wrap)
- Cleaning costs at your old place
- Bond shortfalls if anything goes sideways
- Ferry fares for inter-island moves
- Time off work
- Takeaways for that first week (you won’t be cooking)
For a typical inter-island move, costs usually fall between $1,800 and $3,000 depending on volume and services. Long-distance South Island moves run between $1,500 and $2,800. Local Christchurch moves vary widely with home size and packing needs. For an exact NZD figure on your specific move, get a free quote from WeMove and we’ll talk you through it.
Get Quotes From at Least 3 Movers
Three quotes. Minimum. And don’t just compare the headline price.
Ask each mover:
- Are you insured, and what does the cover actually include?
- Do you handle inter-island moves directly, or sub-contract?
- What’s the hourly rate vs. fixed quote? Which suits my move?
- Can you provide packing materials? At what cost?
- What happens if my move runs over the booked window?
If a mover won’t put their answers in writing, walk away.
Check If You Qualify for WINZ Moving Assistance
This is the bit no other checklist talks about.
Work and Income NZ can sometimes help cover moving costs for people on a low income, on a benefit, or facing financial hardship. The two payments most relevant are the Special Needs Grant (you don’t pay it back) and the Recoverable Assistance Payment (interest-free, paid back over time).
Eligibility depends on your situation, your income, and why you’re moving. Rules change too, so always check the current criteria on the Work and Income website before applying.
We deal with WINZ-funded moves all the time. If you’ve been approved for help and need a properly itemised quote in the format WINZ accepts, get a WINZ-compliant moving quote from WeMove here. We’ll handle the paperwork side.
Start the Big Declutter
Every box you move costs money. Either in mover’s time or in your back. So get ruthless now.
Go room by room. Four piles:
- Keep: actually used in the last 12 months
- Donate: Sallies, Habitat for Humanity ReStores, Christchurch City Mission, or your local op shop
- Sell: Trade Me, Facebook Marketplace, garage sale
- Dump: broken, expired, or just plain junk
A solid declutter at the 8-week mark can shrink your move by 20-30%. That’s real money saved.
If your new place isn’t ready when you move out, WeMove’s storage solutions can bridge the gap.
6 Weeks Before: Lock In the Logistics
You’ve planned. Now you commit.
Book Your Movers (Earlier = Cheaper)
In NZ, summer is mover madness. December through February gets booked solid, especially for inter-island work. Locking in your mover six weeks ahead isn’t paranoia. It’s how you get the date you actually want at a fair price.
If you’re moving in peak season, push to book even earlier. Eight weeks isn’t too far out for a January move.
Notify Your Landlord (Renters)
For periodic tenancies in NZ, the standard tenant notice period is 28 days in writing. Fixed-term tenancies have their own rules, so check your agreement. Always confirm current rules on the Tenancy Services website since tenancy law gets updated.
Send your notice by email or post. Keep proof. While you’re at it, ask the landlord to confirm the bond inspection date.
Order Your Packing Supplies
Rough rule of thumb on boxes:
- 1 bedroom flat: 25-35 boxes
- 2-3 bedroom home: 50-70 boxes
- 4+ bedroom home: 80+ boxes
You’ll need a mix of small (for books and heavy stuff), medium (general), and large (light bulky items like bedding). Plus tape, bubble wrap, and at least three thick markers.
Free box hacks: ask your local supermarket the night before recycling day. Bunnings often has cardboard out the back. Trade Me’s “free” section usually has someone offloading boxes from their last move.
If you’d rather not bother with all that, WeMove’s packing service handles the whole thing for you.
Plan for Pets and Plants
Pets stress out badly on moving day. Book a kennel, a friend, or a dog daycare for the day. Same for cats, just a quiet room with their food and litter works fine.
For inter-island moves, plants and soil come with restrictions. The Ministry for Primary Industries (MPI) has biosecurity rules between the North and South Islands to stop pests spreading. Check before you pack a single pot plant.
4 Weeks Before: Address Changes and Utilities
This is the admin slog. Block out an evening, put on a podcast, and grind through it.

NZ Utilities Checklist
Aim for a 2-week disconnect/connect window. That gives you breathing room either side.
- Power providers in NZ: Genesis, Mercury, Contact, Meridian, Electric Kiwi, Frank Energy, Powershop, Nova Energy.
- Internet providers: Spark, One NZ (formerly Vodafone), 2degrees, Skinny, Slingshot, MyRepublic.
- Gas (where applicable): Genesis, Contact, Nova.
- Water: Council-managed in most regions. In Christchurch that’s the Christchurch City Council. In Auckland, Watercare. No need to “transfer” usually, just update your address with council.
- Use Powerswitch to compare power providers before your move. It is free and independent, and Kiwi households save an average of $400 or more when they check. Moving home is a good time to switch to a better deal.
- Book your internet connection at least 4 to 6 weeks before moving. Fibre installation can take a few weeks in some areas, so you do not want to arrive without WiFi. Contact Spark, One NZ, or your preferred provider early.
Update Your Address: The NZ List
Tick these off:
- NZ Post mail redirection (you can buy 3, 6, or 12 month redirects on nzpost.co.nz)
- Inland Revenue (IRD) via myIR
- Waka Kotahi NZ Transport Agency: Update your driver licence and vehicle registration within 7 days after moving. This is a legal requirement and must be done on time. You can do this online at nzta.govt.nz
- Bank accounts and credit cards
- KiwiSaver provider
- House and contents insurance
- Doctor (PHO enrolment) and pharmacy
- Vet if you’ve got pets
- AA Membership
- Electoral Commission to update your enrolment
- School zone enrolment for kids changing schools
- Subscriptions (streaming, deliveries, magazines)
- Employer payroll
Transfer Medical and School Records
Your new doctor will request records once you enrol. But it speeds things up if you call your old GP and ask them to forward your file.
For kids, contact the new school directly. They usually request records from the previous school. A few things to know before the move:
- Use the school zone finder on Ministry of Education New Zealand website (education.govt.nz) to check which schools your new address falls into before choosing a suburb.
- If your preferred school is outside your zone, you may need to apply for an out of zone place. These are often decided by ballot, so apply early as soon as you know your moving date.
- Contact both the old and new school at least 4 weeks before moving. This gives enough time for records transfer and enrolment paperwork.
Homeowners: Your Key Extra Steps
If you are buying instead of renting, your moving checklist has some extra steps. Bond refunds and landlord notice do not apply. Instead, focus on settlement day, inspection, and legal handover.
Before Settlement Day
- Arrange your solicitor or conveyancer early. They manage the legal transfer, work with the seller’s lawyer, and handle settlement funds. Do not leave this to the last weeks.
- Confirm your settlement date and possession time with your solicitor and agent. This is when you legally receive the keys. Plan your move based on this date.
- Book your pre-settlement inspection 1 to 2 days before settlement. Check the property condition and confirm all listed items like stove, dishwasher, and curtains are present and working.
- Arrange home and contents insurance from settlement day. Your lender will require this. Do not assume your old policy covers the new home.
- Confirm your home loan is ready. Your bank will transfer funds through your lawyer. Sign all mortgage documents at least one week before settlement.
On Settlement Day
- Your lawyer completes the transfer. The title is registered with Land Information New Zealand in your name. You do not need to be there, but stay available.
- Once settlement is complete, your agent or lawyer will give you the keys. Collect garage remotes, alarm codes, and spare keys.
- Take meter readings for power, water, and gas as soon as you enter. Take photos with date proof.
- You can leave a short note for the new owners at your old property. Share helpful details like bin day, water mains location, or small house tips.
First Couple of Weeks: Owner Priorities
- Update your property rates with your local council. They usually get updates through Land Information New Zealand, but confirm to avoid issues.
- If not done yet, create a will. This is important once you own a home. Your solicitor can help with this.
- Check if the property has a valid Code Compliance Certificate if it is a newer build. Some lenders require this.
2 Weeks Before: Packing and Prep
You’re in the thick of it now. Stay calm. Stick to the plan.
The Smart Packing Order
Pack the stuff you don’t need first. Save the essentials for last.
Pack now:
- Out-of-season clothes
- Books, decor, photo frames
- Garage and shed items
- Spare bedding and towels
- Display kitchenware
Save for last:
- Daily kitchen essentials
- Bathroom basics
- Bedding you’re using
- Laptop, chargers, daily medications
Label Like a Pro (Colour-Code System)
One colour per room. Yellow for kitchen, blue for main bedroom, green for kids’ room, and so on.
Mark every box with three things:
- The room it belongs in
- A short list of what’s inside (“pots, pans, baking trays”)
- FRAGILE or OPEN FIRST if it applies
Future you will thank past you.
Pack a Kiwi Survival Box
Forget the “first night box.” This is a Kiwi survival kit. Pack it last. Keep it in your car. Don’t let movers near it.
What goes in:
- Jug, mugs, tea bags, coffee, milk powder. Non-negotiable.
- Toilet paper. Two rolls minimum.
- Phone chargers and a power board
- Bedding and pillows for one night
- Toothbrush, toothpaste, soap, towel
- Basic toiletries
- Important docs folder: passport, IRD letter, tenancy agreement, mover paperwork
- Snacks and bottled water
- A torch and an extension cord
- Pet food for one day
- Kids’ comfort toy or blanket

What Movers Can’t Take
NZ movers can’t legally transport certain items. Plan to move these yourself, or get rid of them.
- Petrol, LPG cylinders, propane
- Fireworks, ammunition, firearms
- Paint thinners, solvents, bleach
- Live plants between islands (MPI rules)
- Perishable food
- Cash, jewellery, important documents (always carry these yourself)
1 Week Before: Final Countdown
Almost there. Don’t drop the ball now.
Confirm With Your Movers
Call them. Don’t text. Confirm:
- Arrival time
- Both addresses (with parking notes)
- Stairs, lifts, narrow doorways
- Fragile items list
- Payment method
If anything’s changed, tell them now. Surprises on moving day cost everyone.
Defrost the Fridge and Empty the Pantry
Defrost 24-48 hours before move day. A wet, smelly fridge in transit is miserable.
Eat down the freezer. Donate unopened, in-date pantry stuff to your local foodbank or Christchurch City Mission. It feels good and saves you carrying it.
Bond Inspection Prep (Renters)
This bit is worth real money. Get it right and you keep your full bond.
The Tenancy Services standard is “reasonably clean and tidy.” That’s vaguer than landlords sometimes pretend, so document everything.
Your bond protection routine:
- Photograph every room once it’s empty. Cupboards open, oven inside, behind the toilet, every corner. Date-stamped.
- Re-do the original property inspection report if you have a copy. Note any pre-existing damage.
- Steam clean the carpets if it’s in your tenancy agreement (it usually is for tenancies over 12 months)
- Check all blinds, curtains, and light bulbs are intact and present
- Get a written receipt for any cleaning service
- Be present at the final inspection if you possibly can
If a landlord tries to deduct unfairly, your photos are your case at the Tenancy Tribunal.
How to get your bond refund
Once you and your landlord agree on any deductions, you both apply for the refund through Tenancy Services New Zealand If there is no agreement, Tenancy Services can help with mediation. For disputes, call 0800 836 262.
Prepare for Moving Day
A few last bits:
- Withdraw some cash. Tipping movers isn’t expected in NZ but it’s appreciated for a hard job. Use your judgement.
- Charge phones, laptops, and a power bank
- Confirm childcare and pet care
- Pull together your survival box
- Get an early night
Moving Day: The Big One
This is just execution now. Stay calm. Stay caffeinated.
Morning Checklist (Before Movers Arrive)
- Strip the beds, bag the bedding
- Last sweep of cupboards, drawers, the airing cupboard, the garage
- Take final meter readings (power, water, gas) and photograph them
- Final fridge check
- Survival box in the car
- Phone charged
While Movers Are Loading
Walk through with the lead mover when they arrive. Point out:
- Anything fragile
- Items going on the truck last (so they come off first)
- What’s NOT going (your survival box, plants if inter-island, etc.)
Then stay accessible. Make tea. Don’t hover, but don’t disappear either.
Final Walk-Through
Once the truck’s loaded, do one last sweep. Every cupboard. Every drawer. The attic. The garage. The garden shed. The letterbox.
Lock all windows. Lock the doors. Drop the keys with the landlord, agent, or in the agreed lockbox.
You’re done with the old place.
Inter-Island Move? Read This First
If you’re crossing the Cook Strait, your move just got more complicated. Here’s what no other guide tells you.
Cook Strait Ferry Options
Two operators run the route:
- Interislander (KiwiRail-owned)
- Bluebridge
Both take vehicles, freight, and people. Check current schedules and book direct on their websites.
Booking Lead Time
In December through February peak, ferries book out weeks ahead. Six to eight weeks is sensible. Eight weeks is safer.
Off-peak you’ve got more flexibility, but don’t push it under three weeks even in winter.
MPI Biosecurity Rules
This trips people up constantly. The Ministry for Primary Industries restricts certain items moving between islands to protect crops and ecosystems.
You generally can’t move:
- Soil
- Live plants
- Certain fruit and vegetables
- Used beehive equipment
Always check the current MPI rules before you pack. The list updates.
DIY vs. Full-Service Inter-Island Move
DIY (drive your own truck across) sounds cheaper but adds up fast once you factor in ferry fees, fuel, accommodation, and your time. A full-service inter-island mover handles the truck, the crossing, and the unload.
For a hassle-free crossing, WeMove’s inter-island moving service does the lot. We do this route constantly and we know what works.
First Week in Your New Home
You made it. Now make the place liveable.
Day 1 Priorities
Before you collapse on the couch:
- Test every smoke alarm. NZ law requires working smoke alarms in every bedroom and living area in rentals. If they’re not working, fix it tonight.
- Locate your essentials: water mains shut-off, fuse box, hot water cylinder, gas shut-off
- Change the locks, or at minimum rekey them. You don’t know how many spare keys are floating around from previous tenants. For owners, this is a 100-quid security upgrade. Worth every cent.
- Plug in the fridge (let it sit for a few hours before food goes in if it was tilted in transit)
- Make the bed. Future you, exhausted at 9pm, will thank you.
Days 2 to 7: Settling In
- Unpack room by room. Start with the kitchen and main bedroom.
- Introduce yourself to the neighbours. Even just a wave.
- Find your council bin collection days
- Update your “Home” pin in Google Maps
- Walk the local area. Find the dairy, the supermarket, the park
- Test your internet and TV setup
- Check every box has actually arrived
A Kiwi Tradition Worth Considering
Some Kiwi families like to bless or “clear” the house before fully moving in. This is whakawātea in te ao Māori, and many non-Māori households do something similar in their own way too. It can be as simple as a quiet moment in each room, or a more formal blessing if that fits your beliefs.
It’s not for everyone. But it’s a meaningful option worth knowing about.
7 Common Moving Mistakes Kiwis Make
We see these every year. Don’t be that family.
- Booking movers too late in summer. December through February is chaos. Book early or pay more.
- Forgetting MPI biosecurity rules when crossing the Cook Strait. That pot plant could land you a fine.
- Skipping the before-and-after rental photos. No photos, no leverage at the bond inspection.
- Not insuring high-value items. Standard mover liability often won’t cover the full value of expensive electronics or art.
- Underestimating ferry crossing time. It’s a 3.5 hour sail plus loading and unloading. Plan a full day.
- Setting utility connect dates AFTER move-in day. You’ll arrive to a cold, dark house. Connect the day BEFORE.
- Forgetting to update IRD. Tax letters go missing, refunds get delayed, headaches multiply.
Free Printable Moving Checklist (NZ Edition)
Want this full checklist in one place that you can print and tick off? We have created a clean PDF with all 8 weeks organised step by step.
Click the button below to download your printable checklist and keep it with you during the move.
And if you’d rather just hand the whole thing to professionals, that’s what we’re here for. Get a free moving quote from WeMove and we’ll take it from here.
Frequently Asked Questions
How much does it cost to move house in NZ?
Costs vary widely based on home size, distance, packing services, and whether you’re crossing islands. A typical inter-island move runs between $1,800 and $3,000. A long-distance South Island move (like Christchurch to Invercargill) typically falls between $1,500 and $2,800. Local moves vary with home size and packing needs. The honest answer is to get three written quotes for your specific situation. Get a free WeMove quote here and we’ll give you a proper number.
How far in advance should I book a mover in NZ?
Six weeks for a normal move. Eight weeks for summer (December to February) or for inter-island moves. Off-peak winter you can sometimes get away with two to three weeks, but you’ll have less choice on dates.
Can WINZ help pay for my move?
Yes, in some cases. Work and Income NZ can offer a Special Needs Grant or a Recoverable Assistance Payment for eligible people on a low income or facing hardship. Eligibility depends on your situation. Check the Work and Income website for current criteria, and contact WeMove for a WINZ-format quote once you’ve been approved.
What’s the cheapest day to move in New Zealand?
Mid-week, mid-month, outside summer. Tuesdays and Wednesdays are usually cheaper than weekends. Avoid the start and end of each month when leases turn over. And avoid December to February if at all possible.
Do I need insurance for my move?
Most movers carry basic transit cover, but it often doesn’t match the full replacement value of your stuff. For high-value items (electronics, art, jewellery) consider checking your contents insurance or asking your mover about additional cover. Always read what’s actually included before you sign.
Can I move my own stuff between islands?
Yes, but factor in ferry costs (vehicle plus passenger), fuel, time off work, and possibly overnight accommodation. For a full house, a professional inter-island mover usually works out cheaper and a lot less stressful. See WeMove’s inter-island service here.
How do I get my full bond back?
Three things. Leave the place “reasonably clean and tidy” as defined by Tenancy Services. Photograph every room thoroughly before handover, dated. Be present at the final inspection if you possibly can. If a landlord tries to deduct unfairly, your photos are your evidence at the Tenancy Tribunal.
I’m buying, not renting. What changes in my checklist?
As a buyer, you need to confirm your settlement date with your solicitor, complete a pre-settlement inspection 1 to 2 days before, arrange home insurance from settlement day, and update council rates after the title transfer. See the “Homeowners: Your Key Extra Steps” section above for full details.
How do I compare power companies when I move?
Use Powerswitch at powerswitch.org.nz. It is a free comparison tool run by Consumer New Zealand. Many households save around $400 or more by switching. Moving is a good time to compare plans since you need to set up power at your new home.
Need a Hand? We Move You Across NZ
We’re WeMove. A locally-owned Christchurch moving company helping Kiwi families since 2017. Five-star Google rating with over 80 verified reviews. We donate to the Christchurch City Mission with every move. NZ-wide service, including inter-island.
Whether you’re shifting across town or crossing the Cook Strait, we’d love to help.